 Clouisle
Model Management
Turn models into reusable platform capability assets in order, through integration, configuration, testing, and rollout.
Feature Overview
Model management is used to uniformly integrate and maintain various models in the platform. Only after a model is correctly configured, tested, and labeled with capabilities here can Agent, workflow, and knowledge base call it stably.
Use Cases
This page is suitable for:
- Integrating a new model provider for the first time
- Adjusting the default model
- Opening different types of models for different businesses
- Troubleshooting unavailable models or abnormal results
Prerequisites
Before you start, we recommend preparing:
- Provider address, API Key, and model identifier
- Description of model-supported capabilities, such as whether it supports vision, function calling, or streaming output
- Expectations for context length, cost, and output limit
Steps
Step 1: Enter the model center and first review the existing model structure
First enter the Model page in Workspace and confirm which models are already integrated into the current platform.
Focus on:
- What names the models are displayed under
- Whether different providers already have unified naming
- Which model types are currently mainly opened by the platform
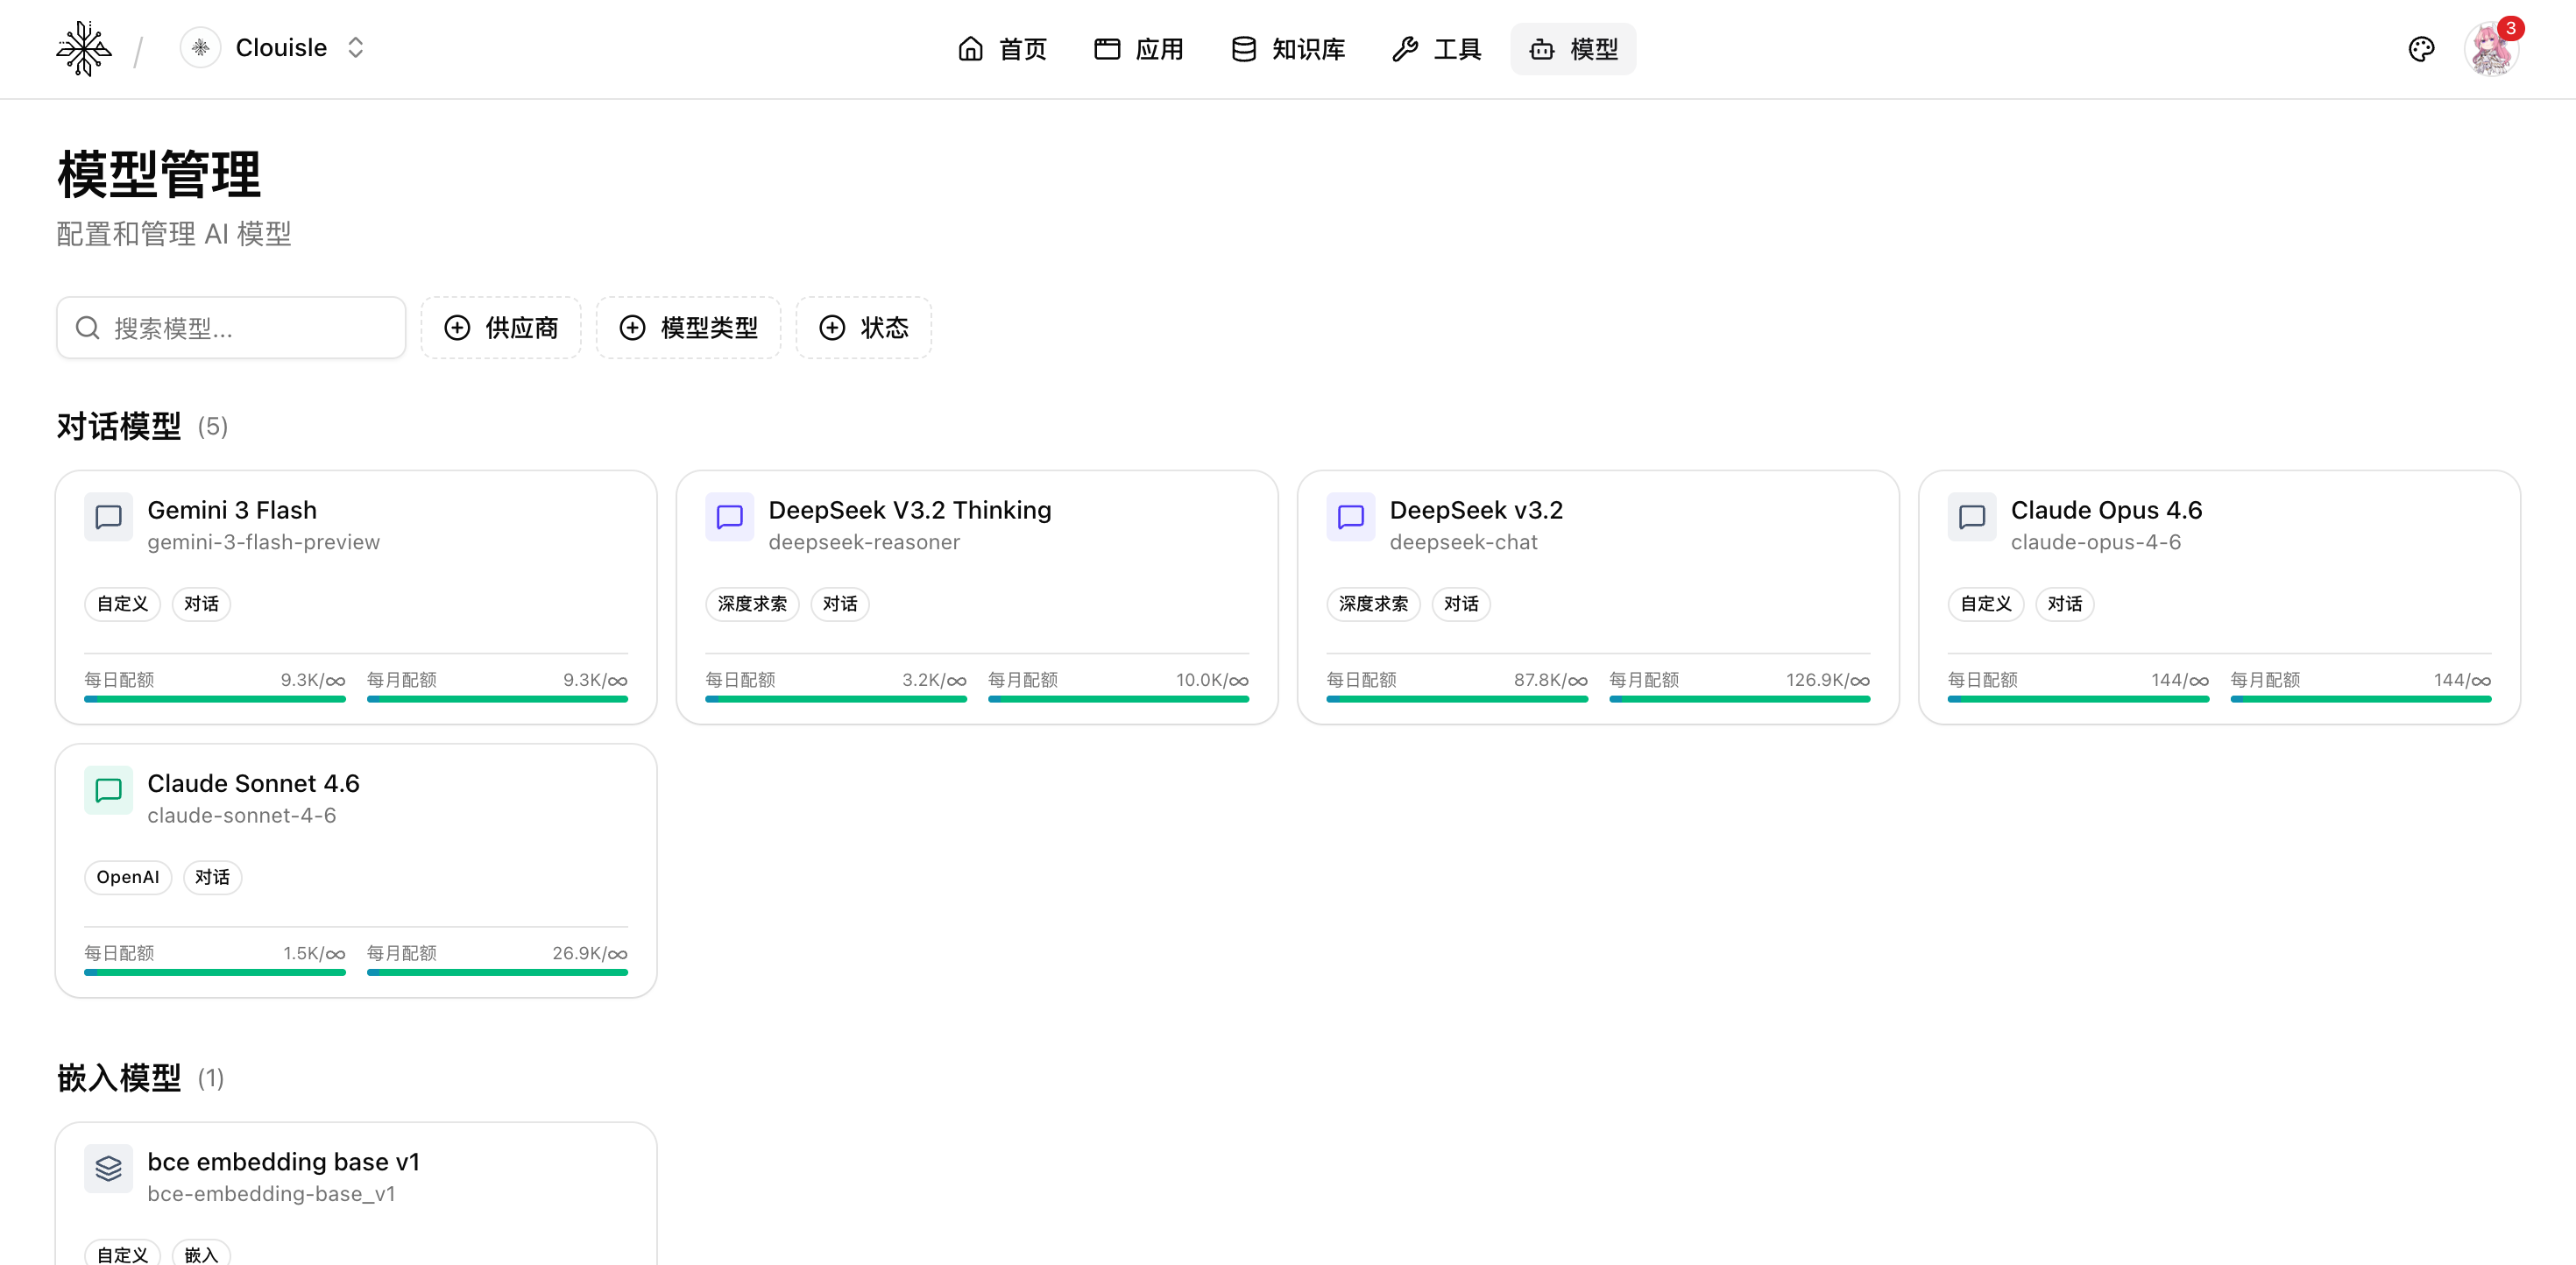
After completing this step, you should be able to determine whether the new model adds a new type of capability or supplements an existing capability tier.
Step 2: Create a model and fill in basic identity information
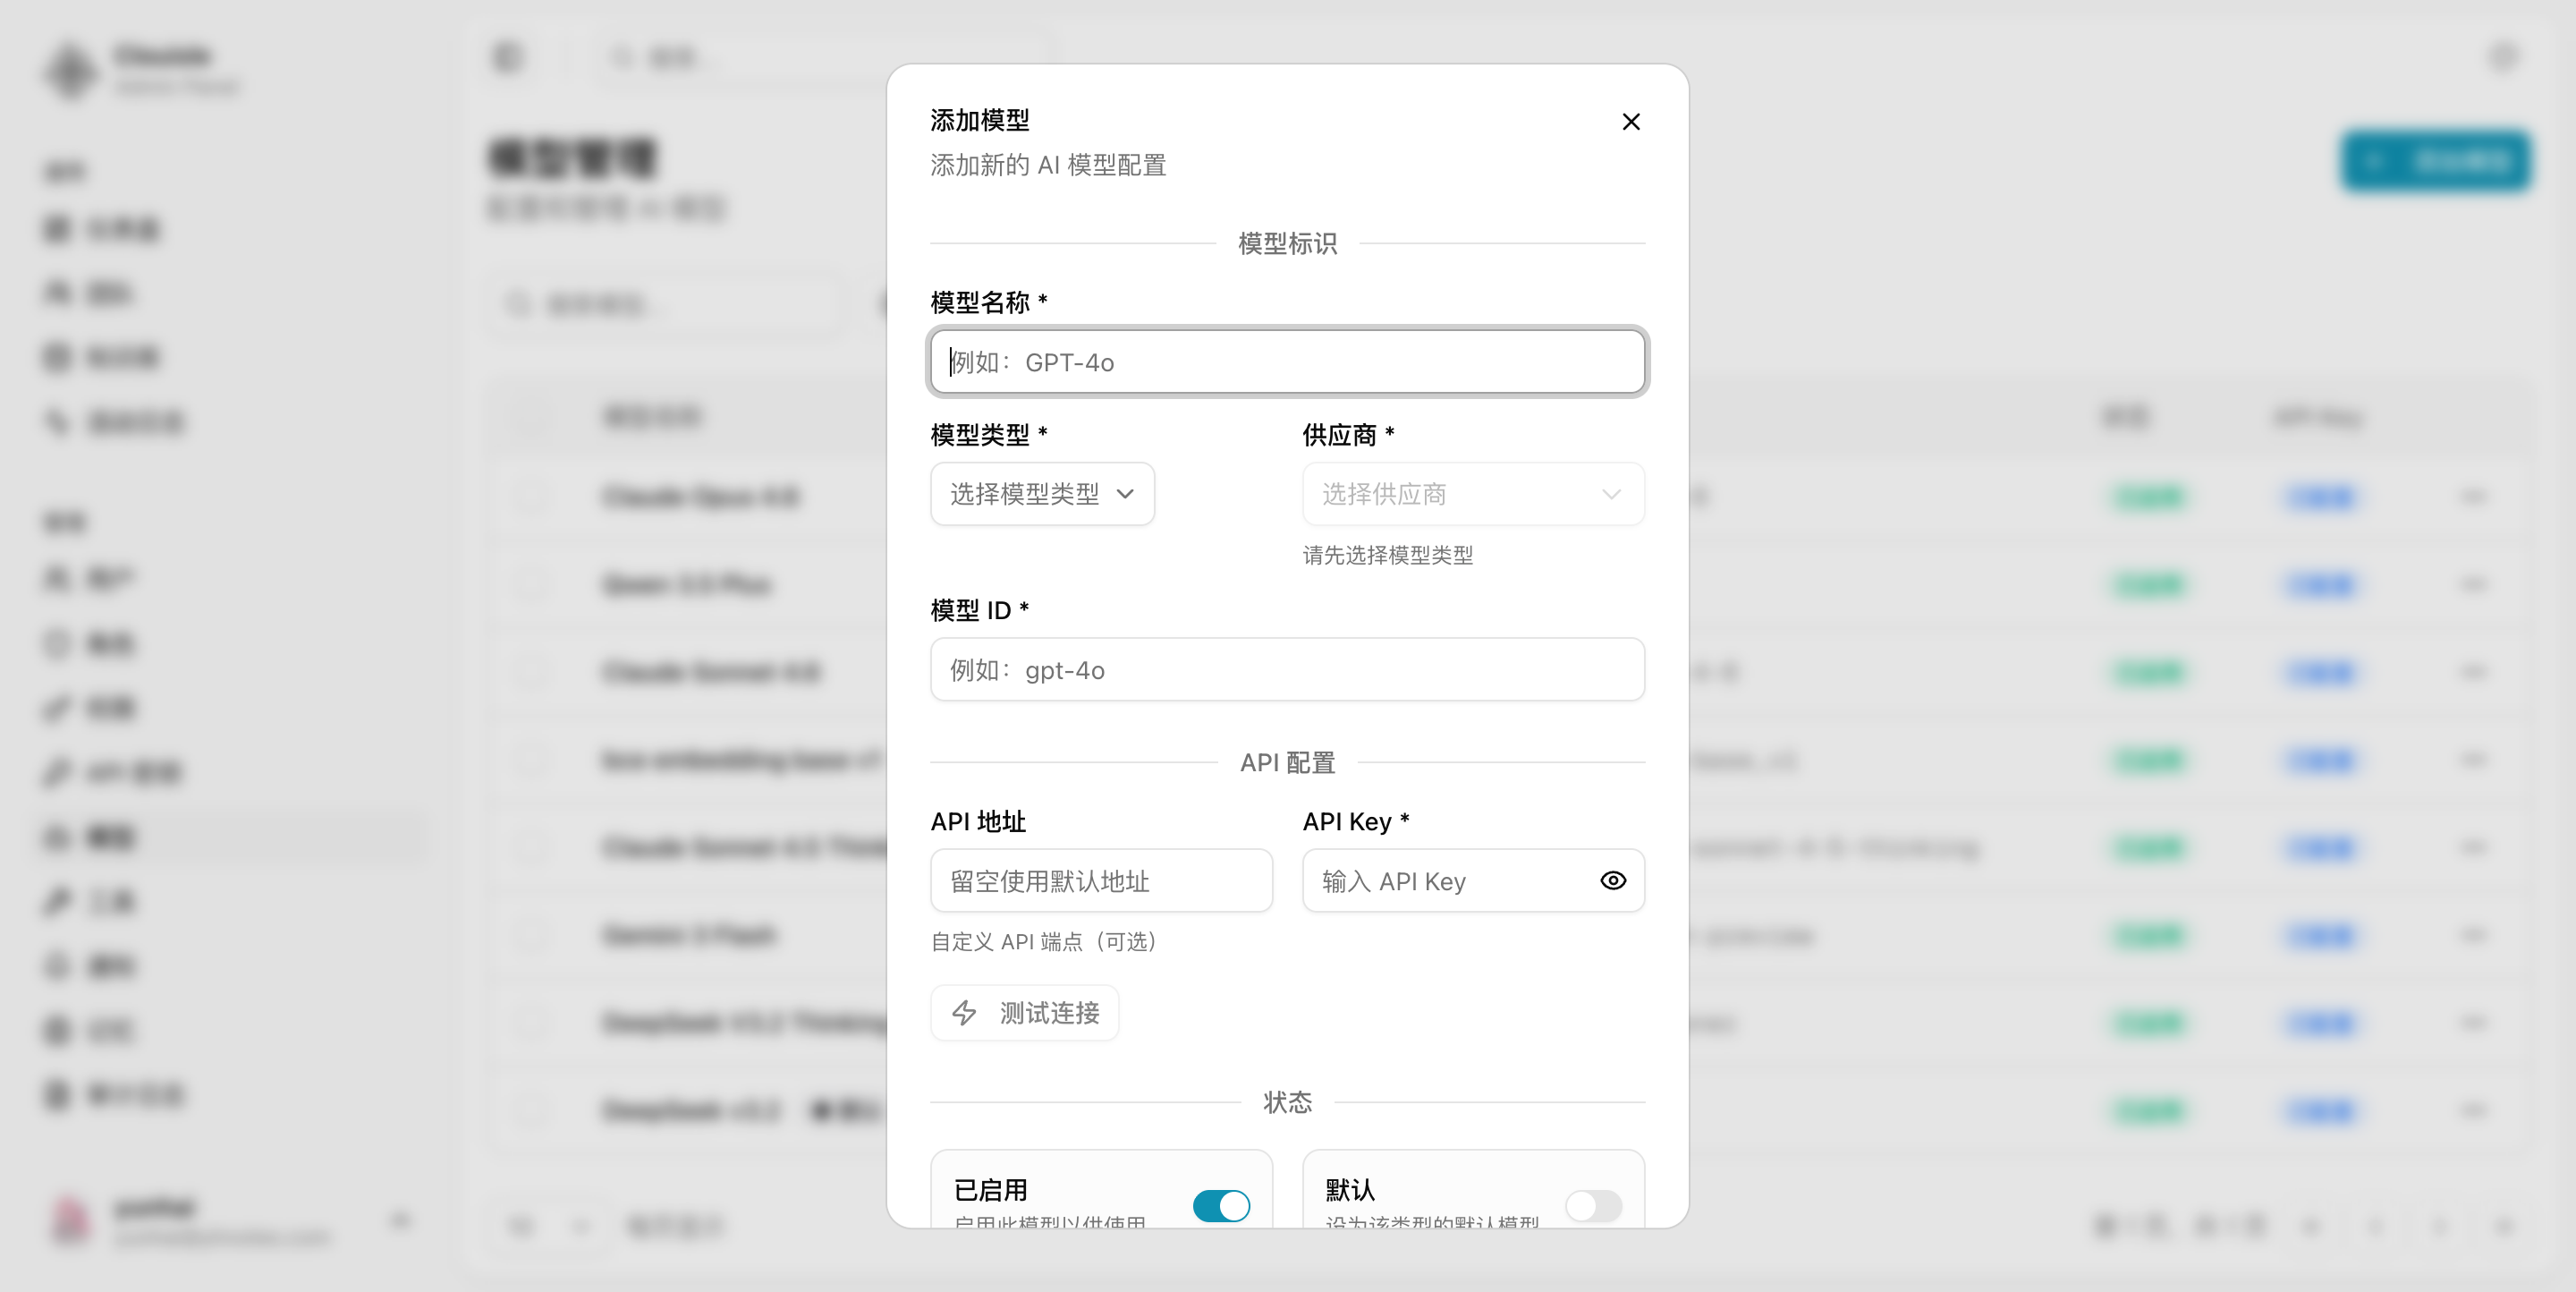
When adding a model, first complete the most basic identity information:
- Model name
- Provider
- Model type
- Purpose description
We recommend that the name directly reflect the capability and provider, such as “OpenAI GPT-4.1”, “DeepSeek Chat”, or “Qwen Embedding”. Do not use only vague names, otherwise it will be difficult to distinguish later in Agent or workflow.
Step 3: Fill in API integration information
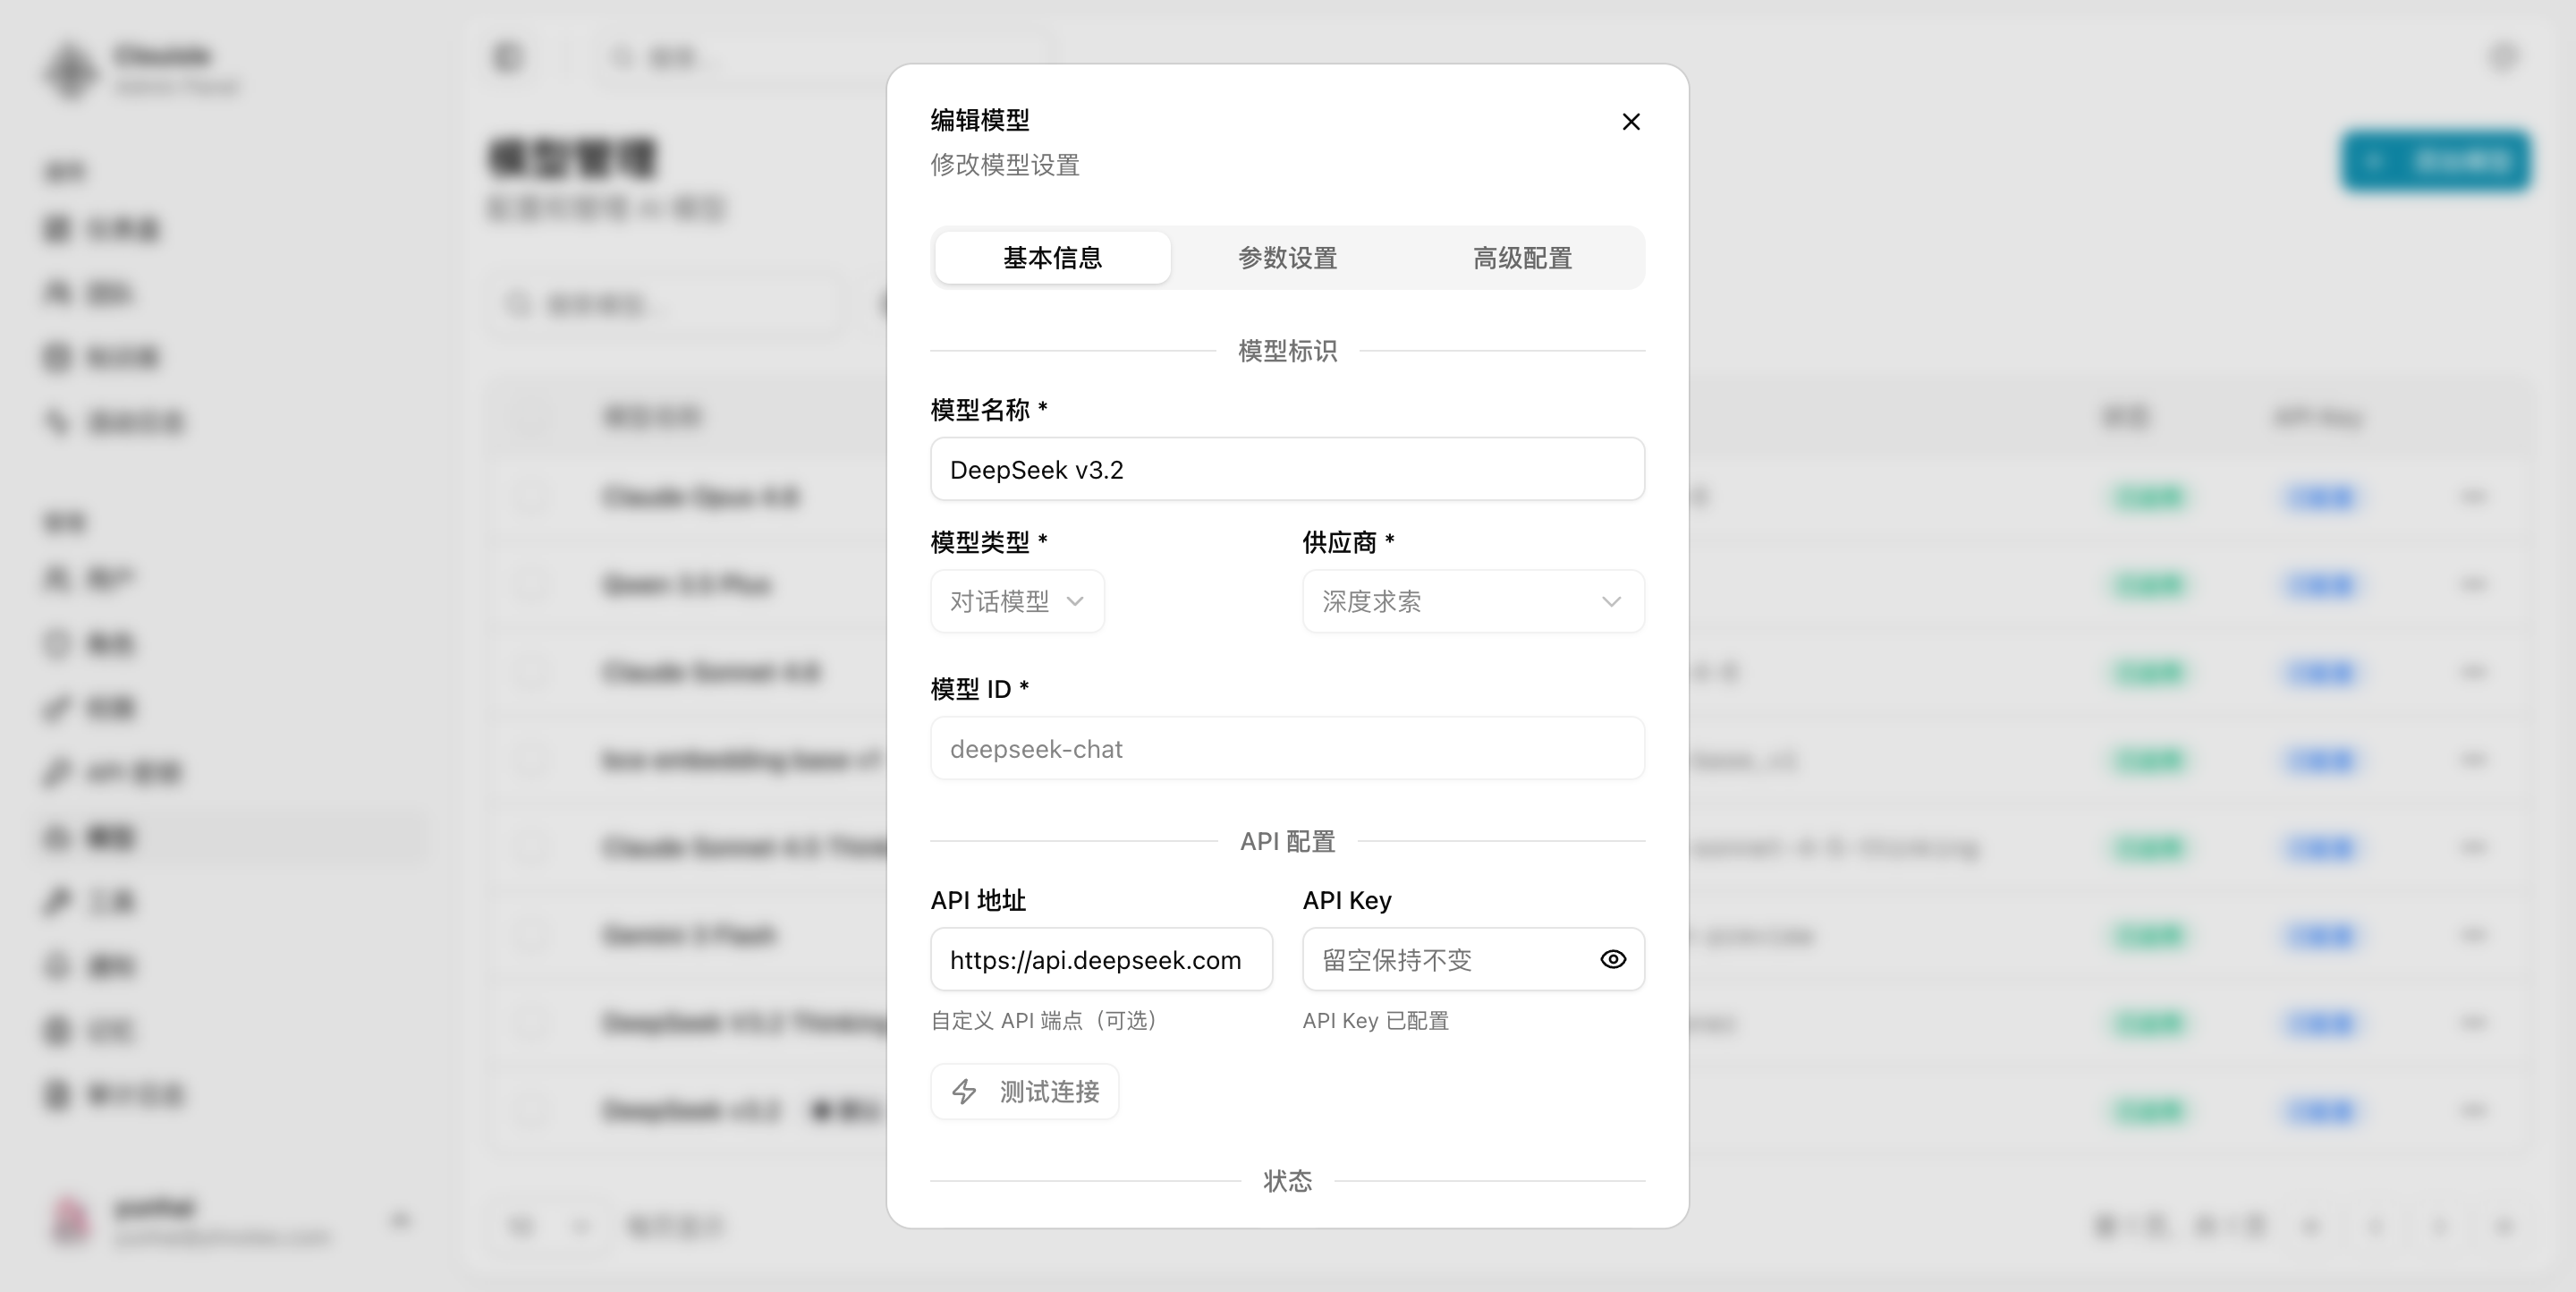
Next, configure the parameters required for the model to actually be callable:
- Base URL
- API Key
- Model identifier
The goal of this step is not to “save first and deal with it later”, but to ensure the model can be requested normally afterward. If this configuration is wrong, any later application-layer test will fail.
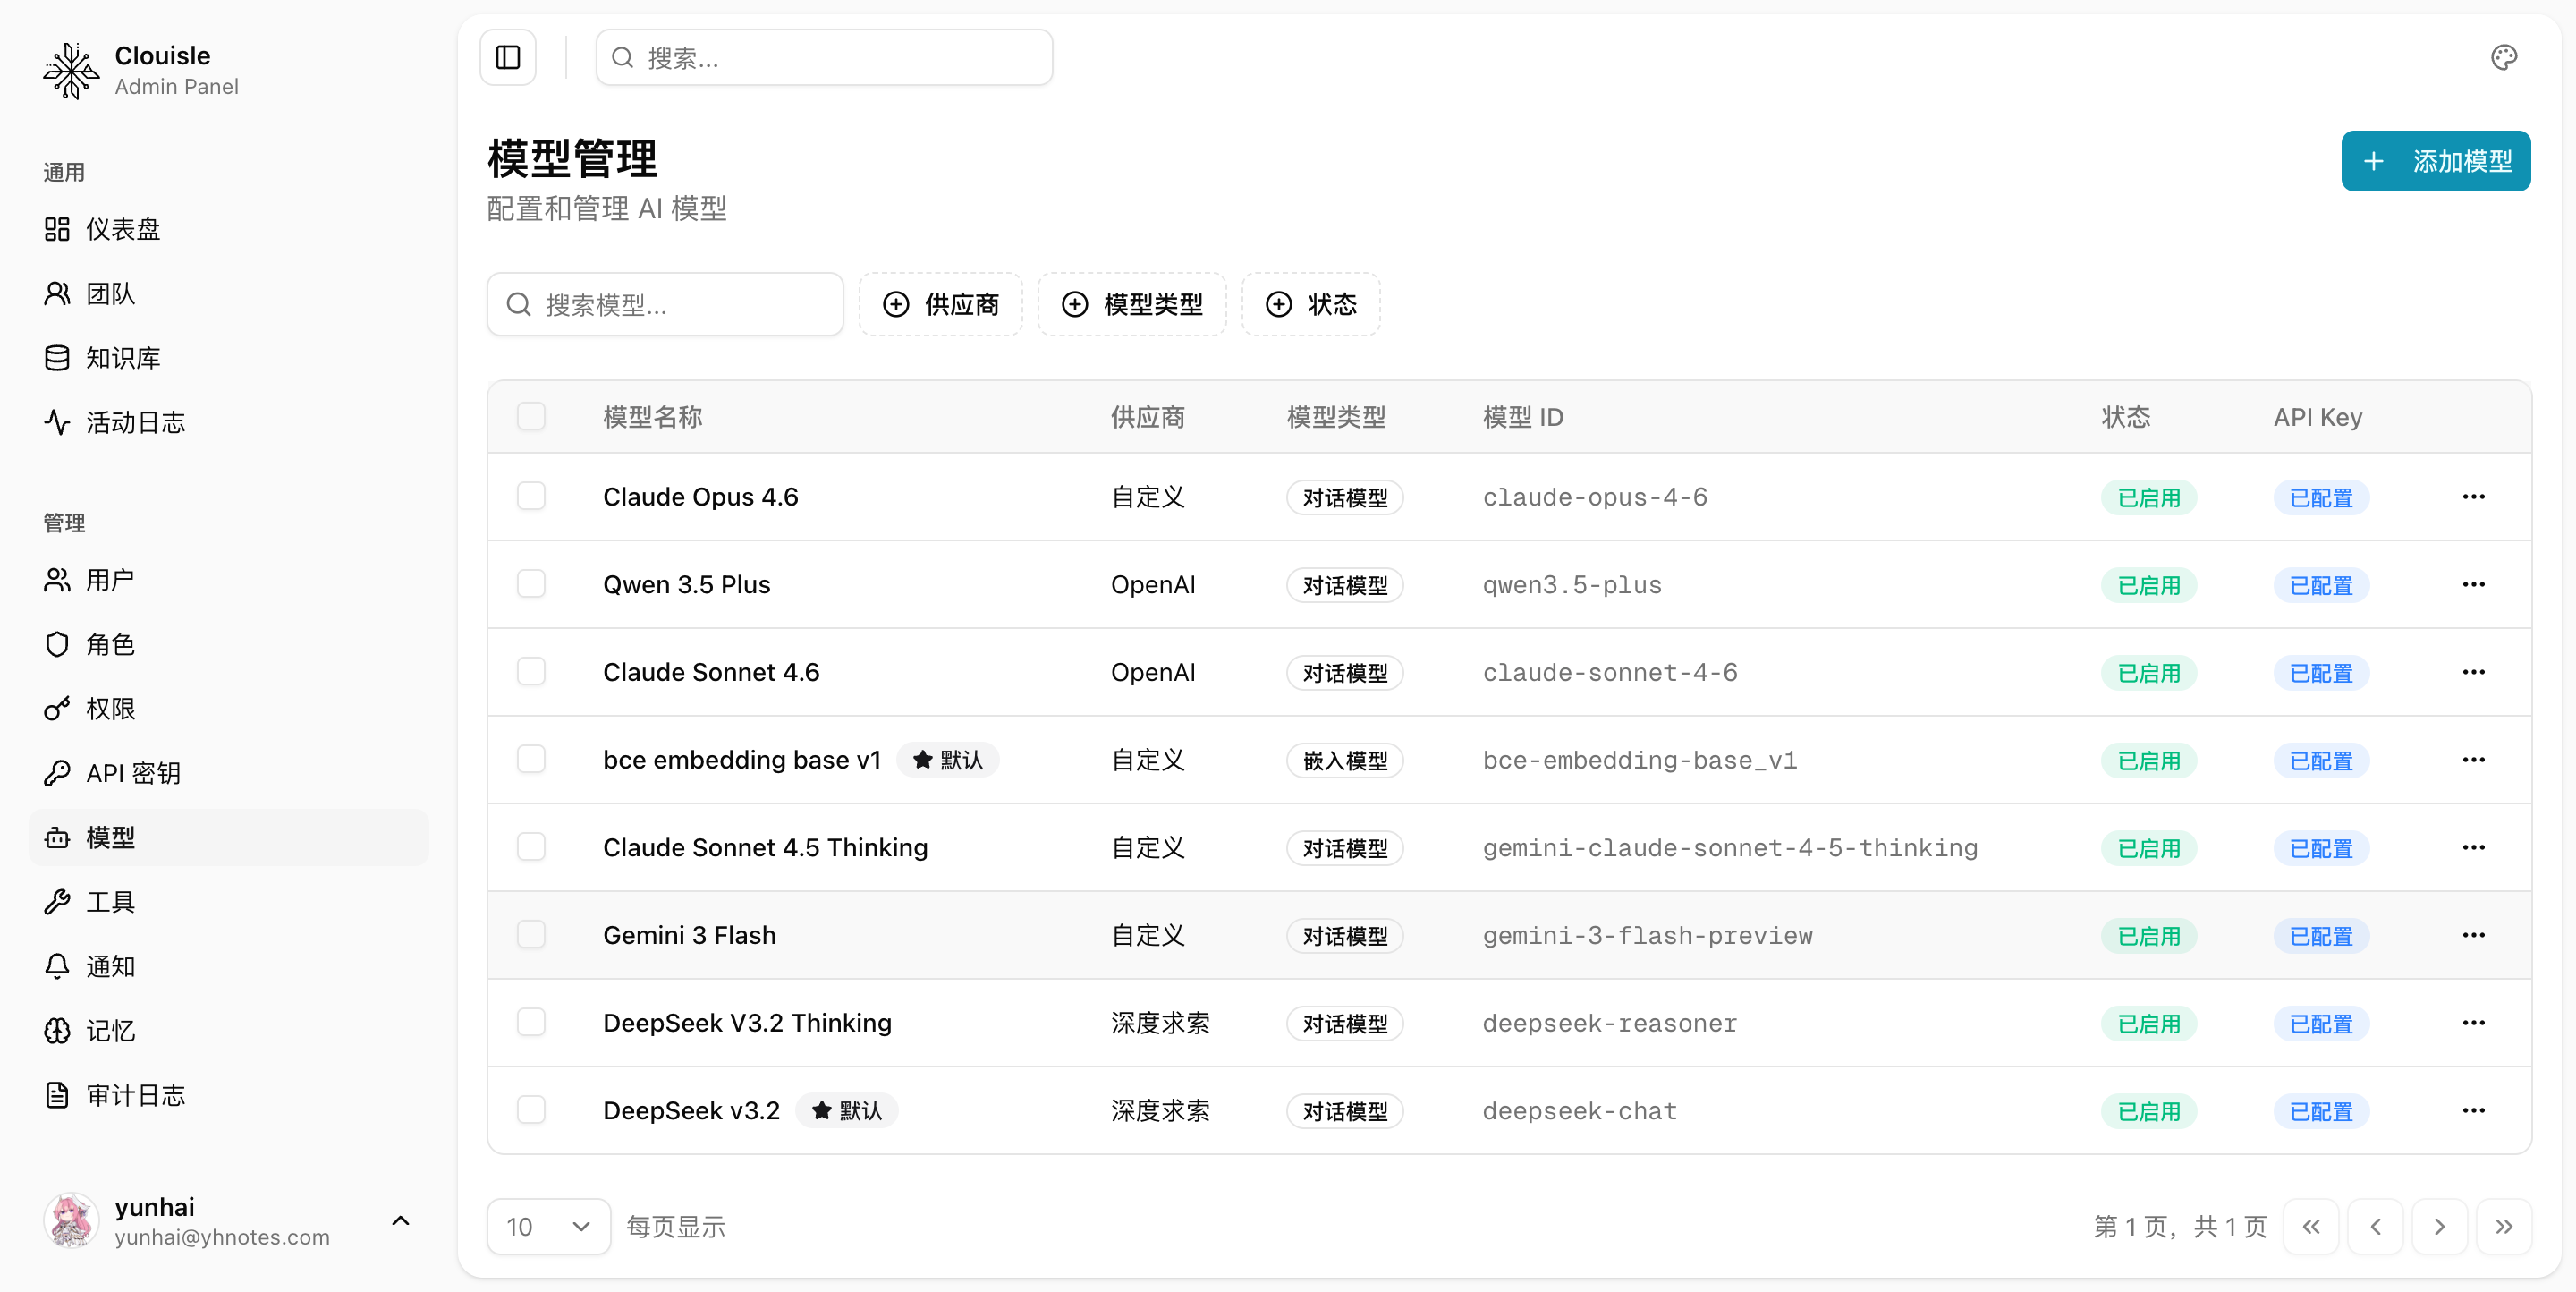
If the model has already been created, you can also enter the edit dialog from the action menu in the model list and directly modify basic information and API configuration.
Step 4: Complete specifications, capability labels, and default parameters
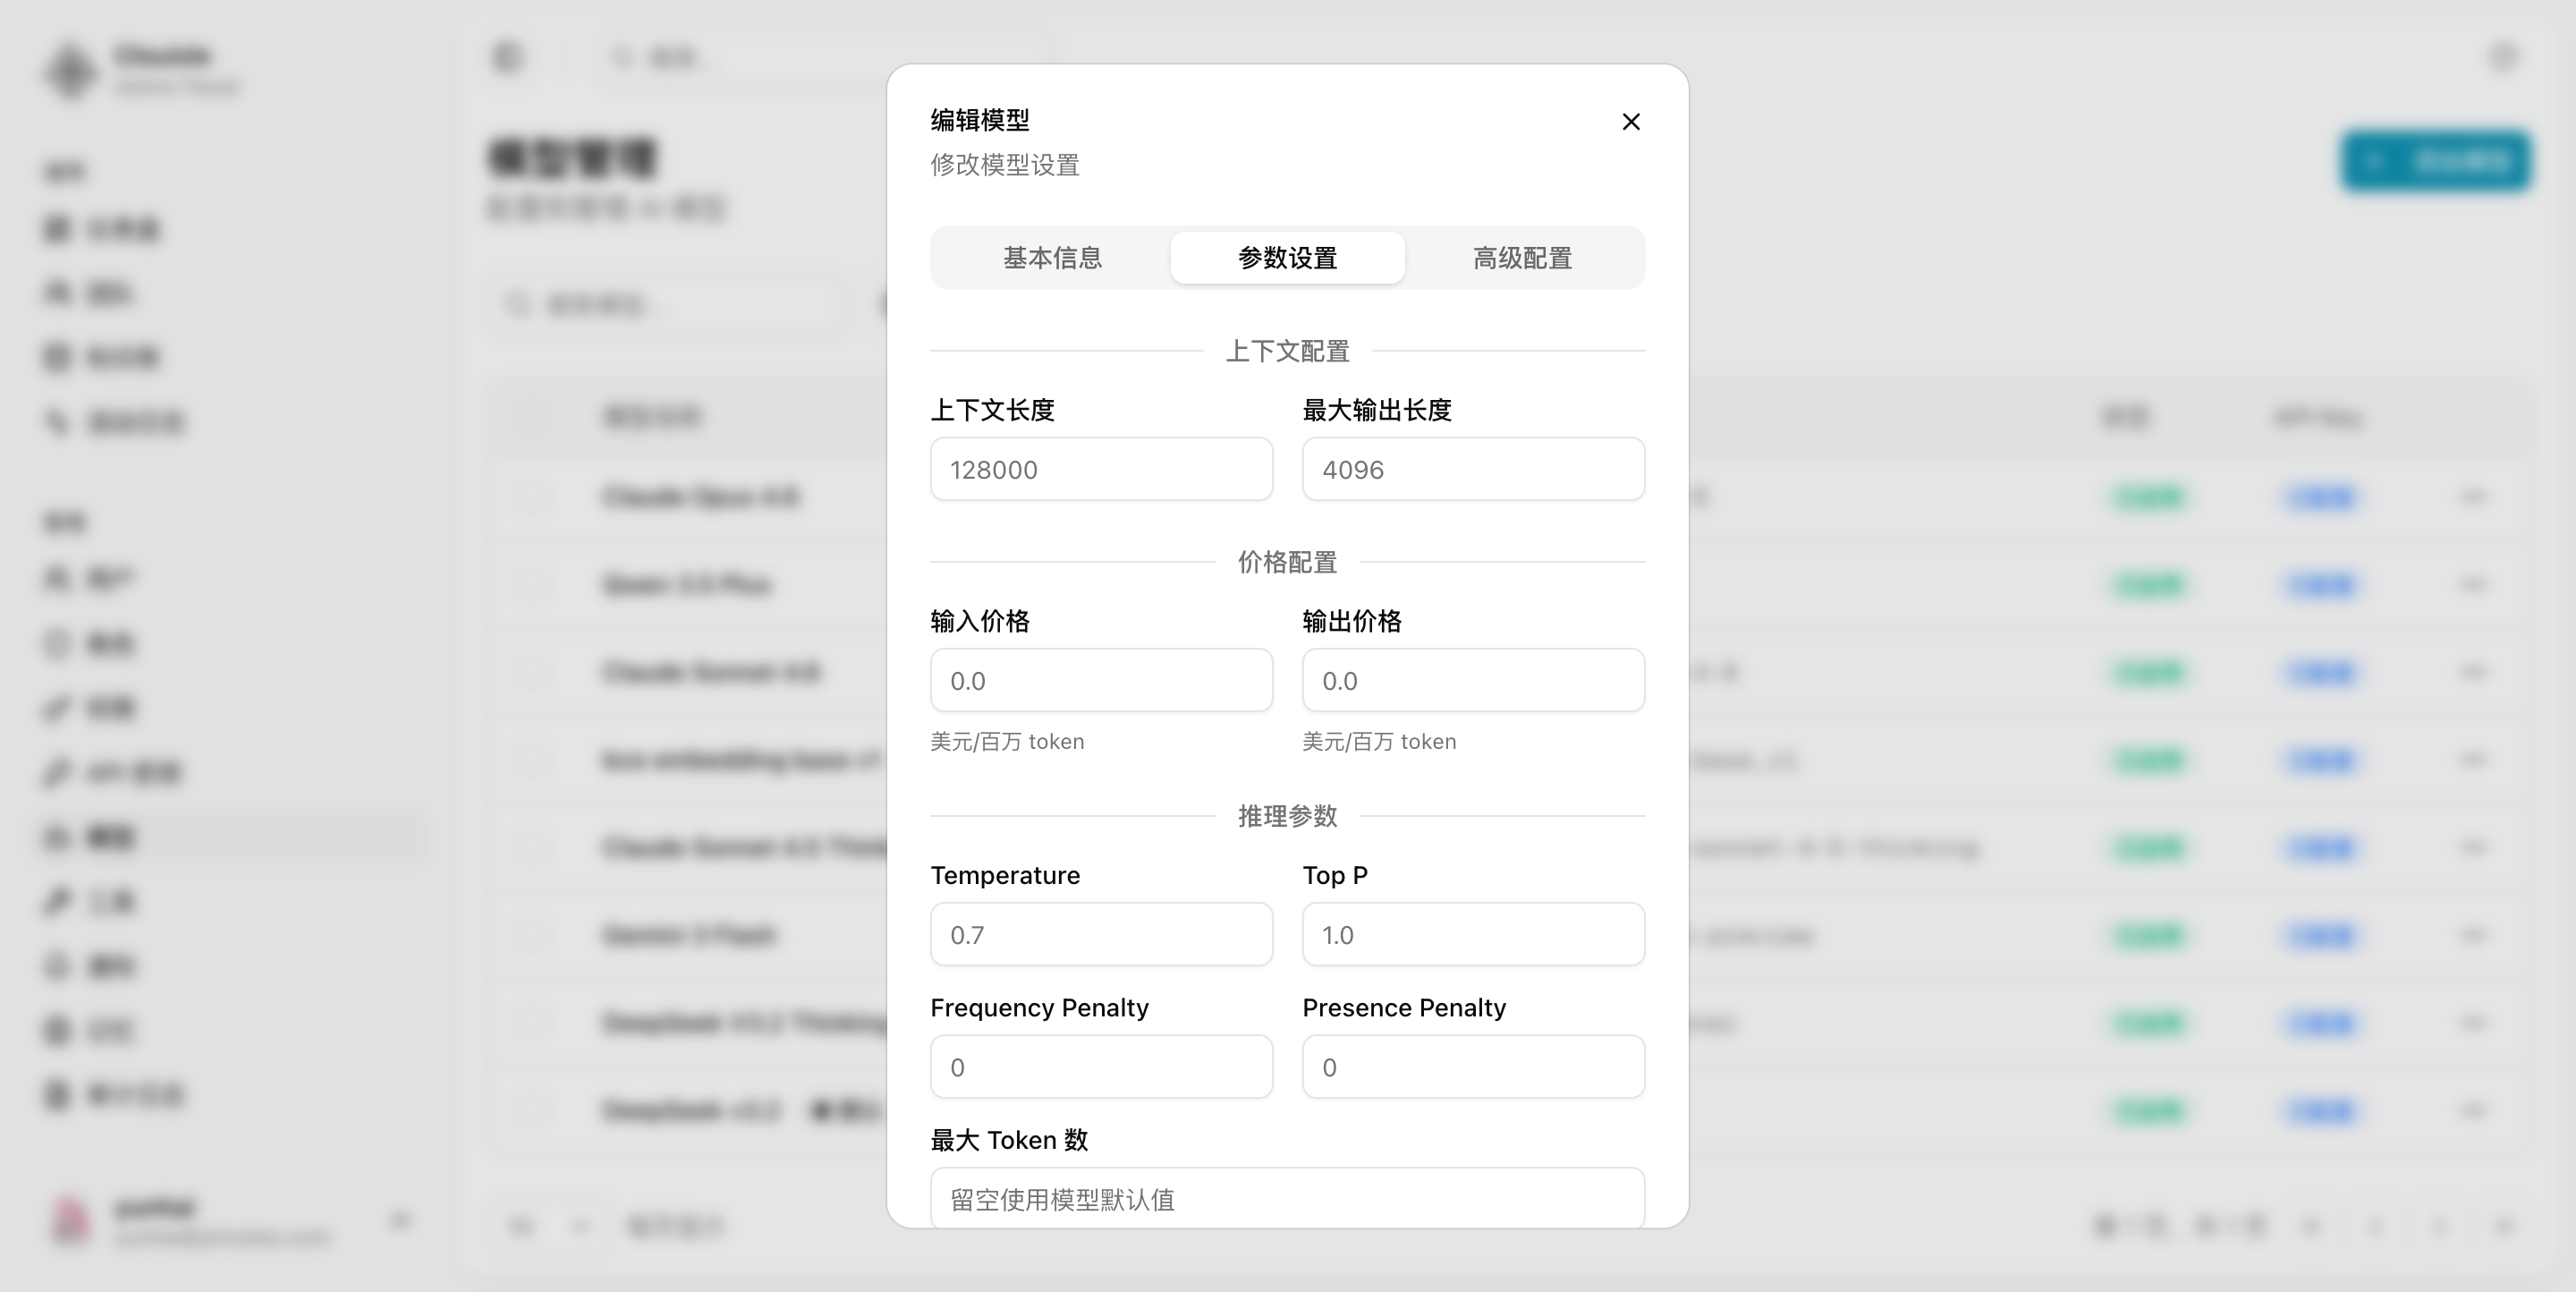
After the basic connection is working, complete the following information that determines user experience and governance capabilities:
- Context length
- Maximum output tokens
- Whether vision, function calling, and streaming responses are supported
- Default inference parameters, such as
temperatureandtop_p - Input and output pricing
These configurations are not only for display. They directly affect:
- Model selection decisions at the application layer
- Team authorization and cost control
- Later troubleshooting
Step 5: Run a model test
After integration is complete, you must immediately run a test instead of waiting to discover issues in Agent. During testing, focus on confirming:
- Whether results can be returned successfully
- Whether return speed is within an acceptable range
- Whether key capabilities are truly supported, such as vision or streaming output
Only after this step passes is the model suitable for the next rollout step.
In the action menu of the model list, you can usually find the Test connection entry directly.
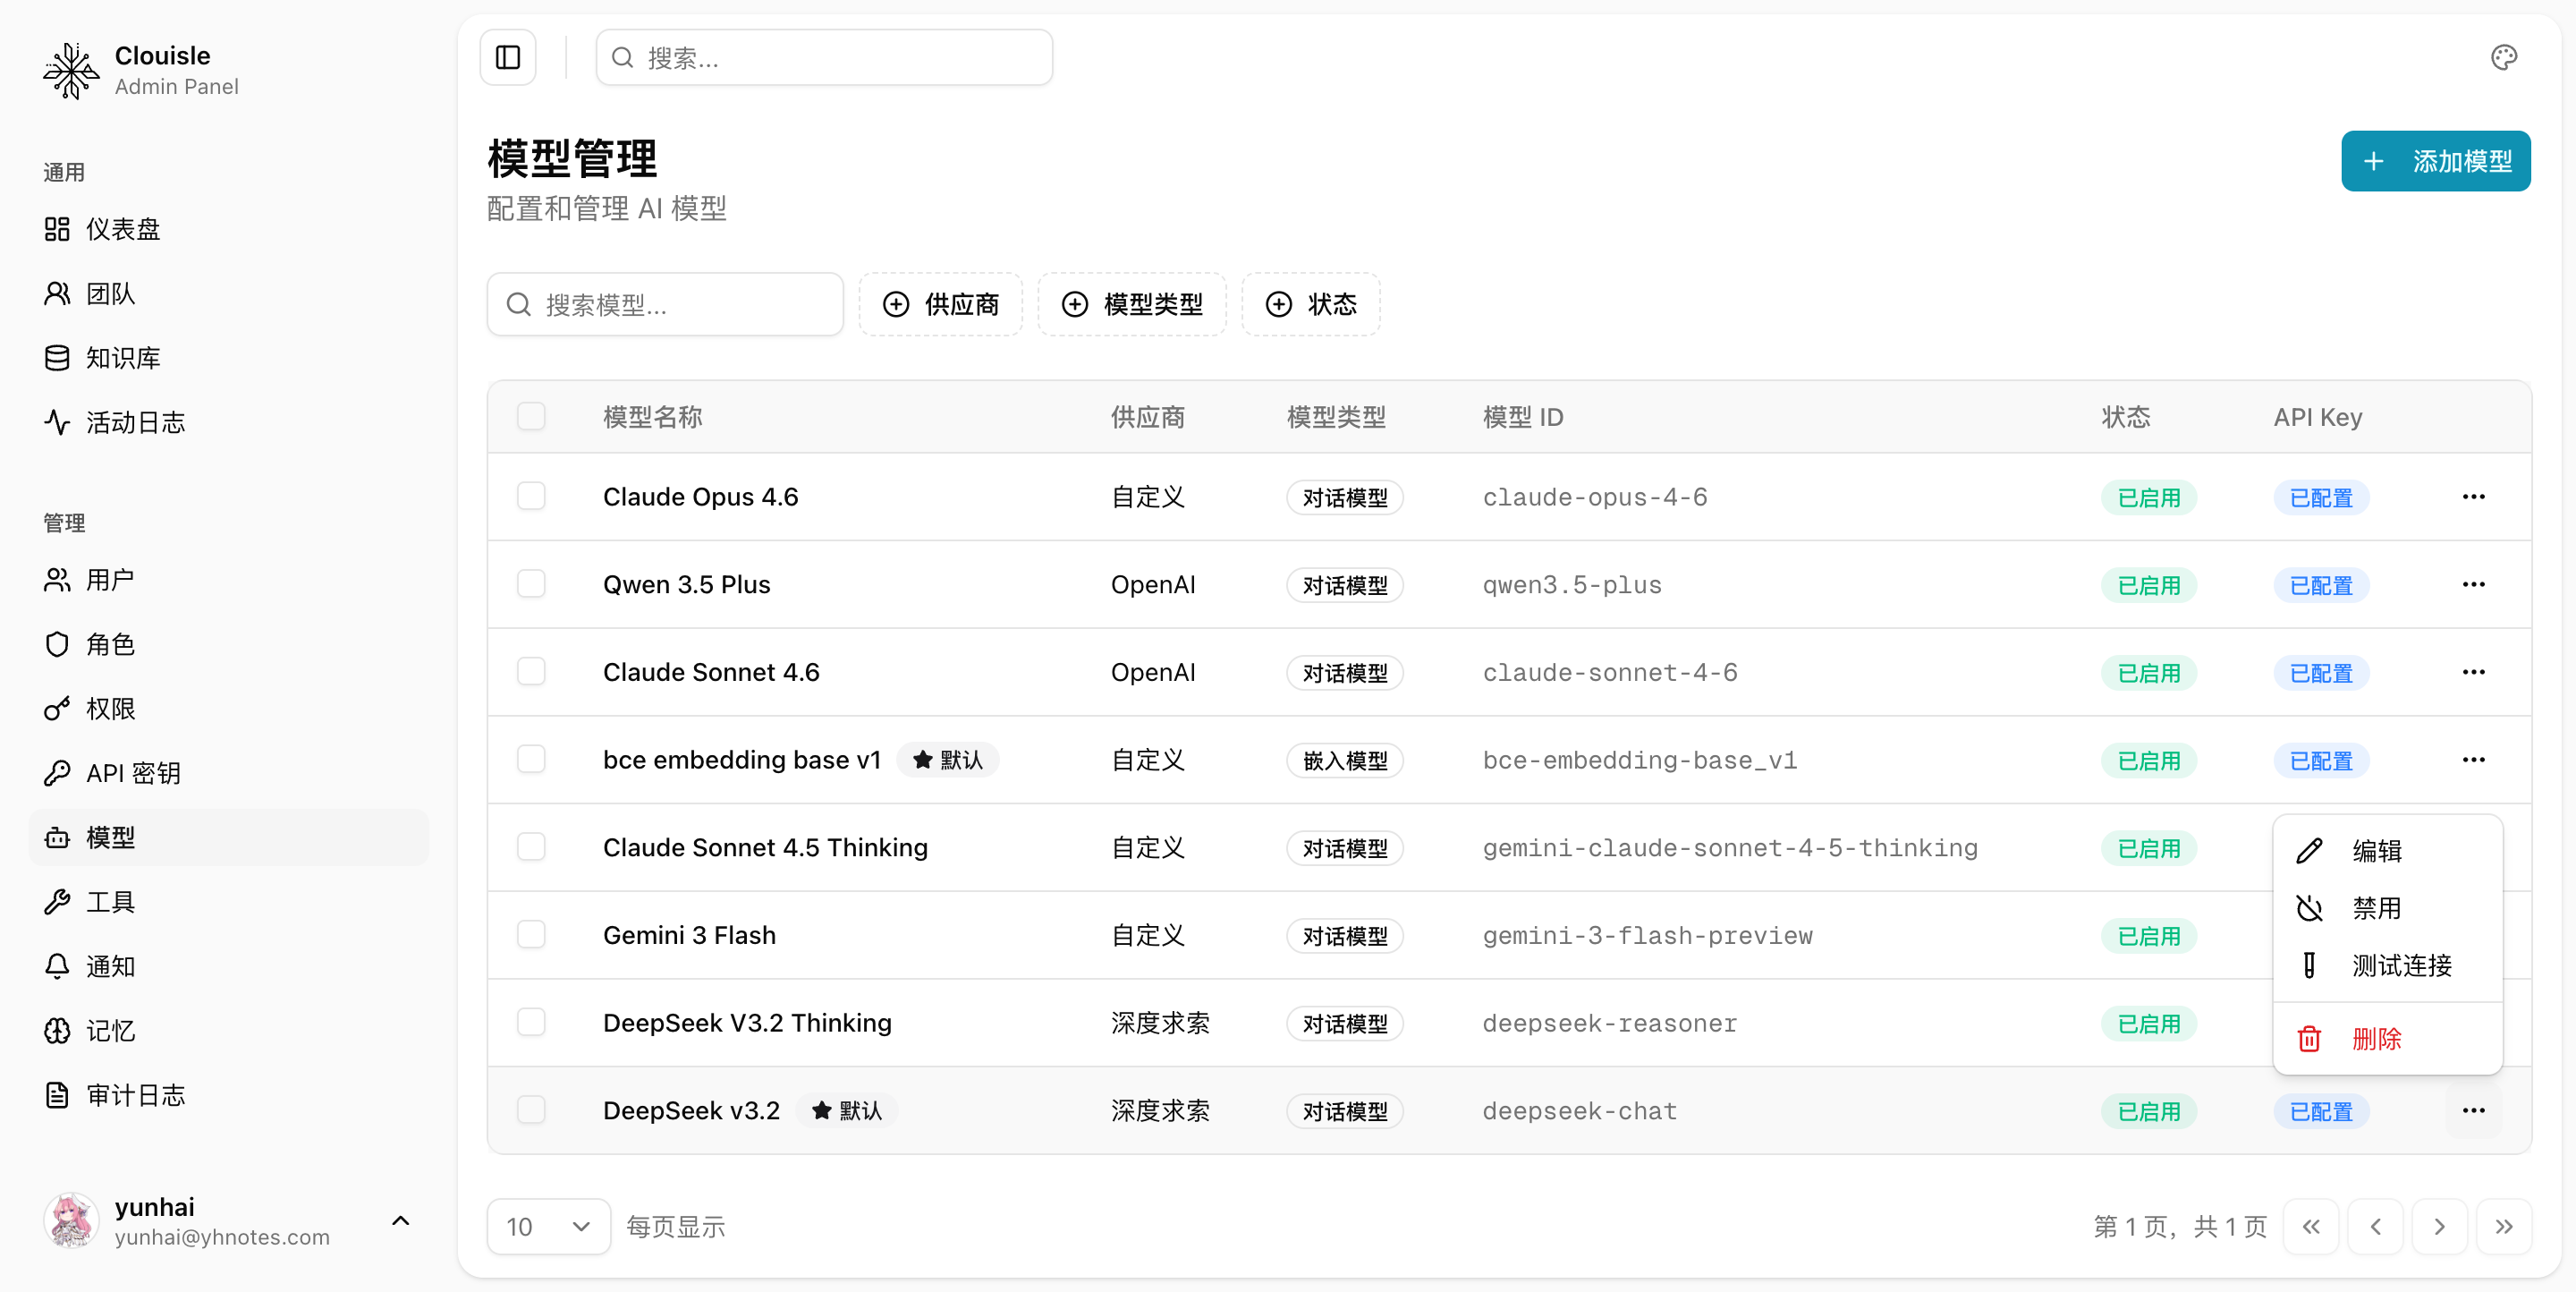
After execution, you should at least see clear success or failure feedback instead of only checking whether saving succeeded.
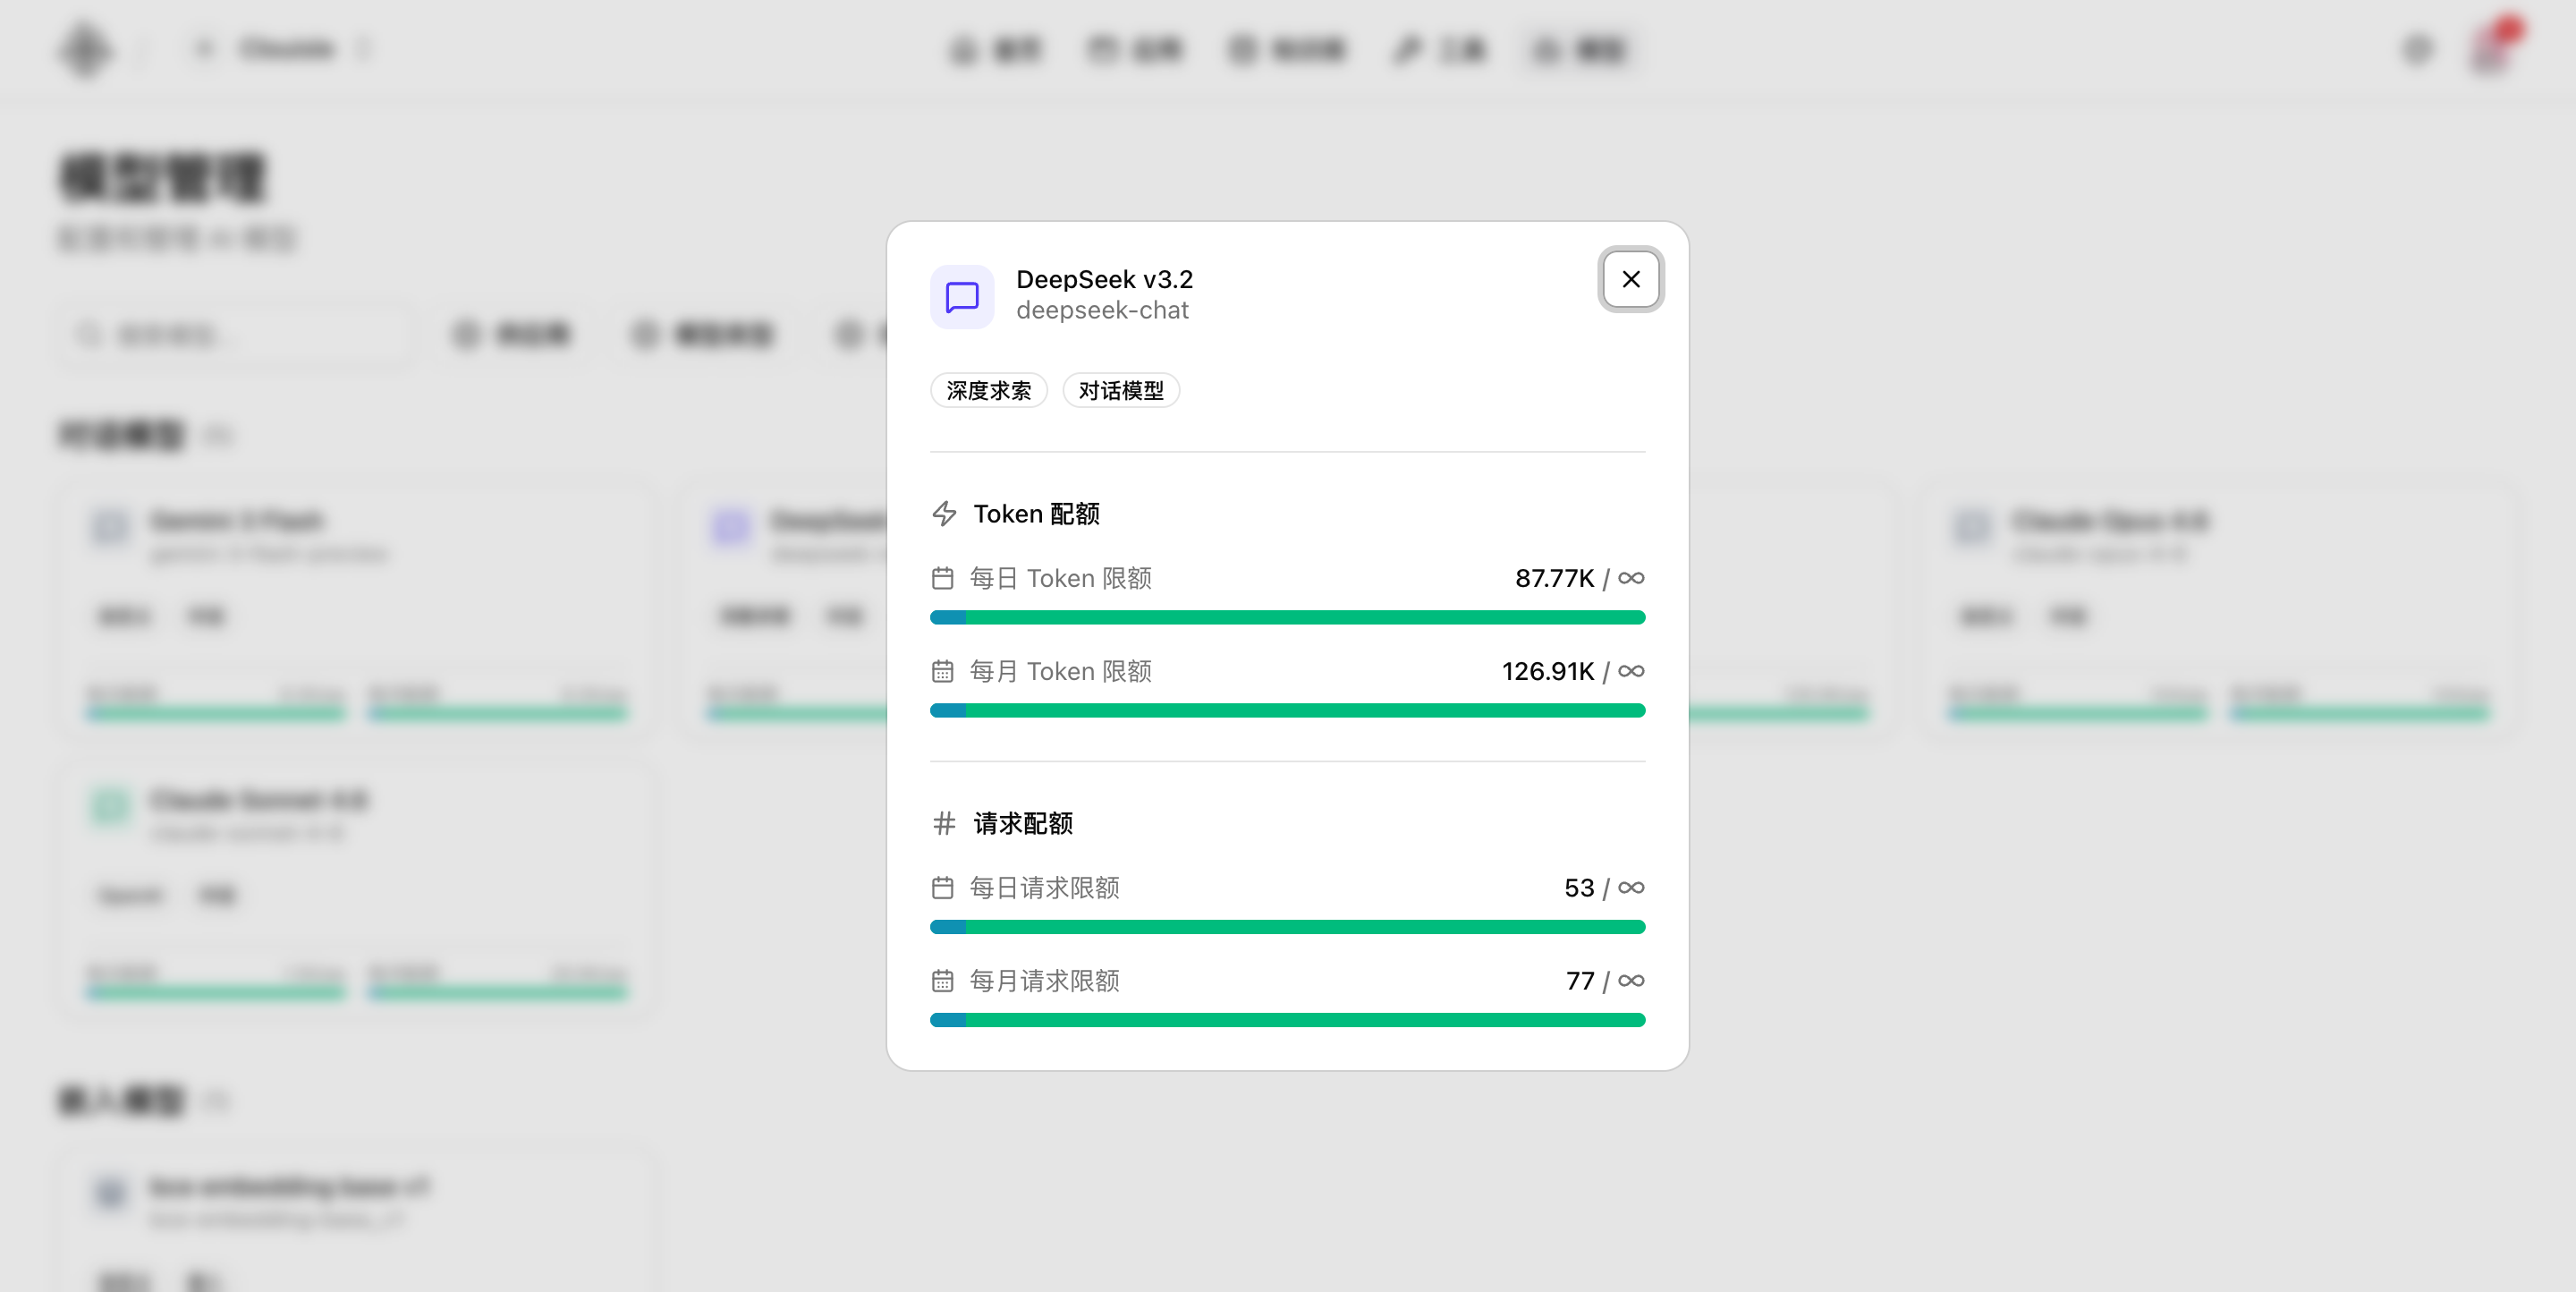
If the current page has not yet entered the full testing flow, at least open the model details first and confirm that its quota and basic status are readable and verifiable.
Step 6: Perform secondary validation in Agent, workflow, or knowledge base
After the model center test passes, go to the real usage scenario and select the model to confirm:
- It can answer normally in Agent
- Workflow nodes can run normally
- If it is an Embedding model, the knowledge base processing path can run successfully
Result Validation
A model that can be put into use should at least meet these requirements:
- Its name and purpose can be clearly identified in the model center
- The test feature can return results successfully
- It can be normally selected and called in actual modules
- Capability labels and pricing information are basically complete
FAQ
Why did saving succeed in the model center, but Agent still reports an error?
First check:
- Whether the Base URL and model identifier are correct
- Whether the API Key is valid
- Whether the module where the Agent is located truly supports this model type
Why is it not recommended to make a model available to everyone immediately after integration?
Because connecting a model does not mean its results are stable. The correct approach is to test it in the model center first, then validate it in a small number of Agents or workflows, and finally expand its availability.
Why should pricing and capability labels also be filled in?
These two items directly affect team authorization, default model selection, and cost judgment. If left blank, later platform governance will become very passive.
Notes
- Test new models first, roll them out in a small scope next, and open them to everyone last
- Keep names, capability labels, and pricing information standardized from the beginning
- Before adjusting the default model, evaluate the cascading impact on existing applications
Admin API
Integrate backend interfaces in order, starting with read-only interfaces, gray validating change interfaces, and connecting governance systems.
Audit and Monitoring
Build an administrator troubleshooting loop in order, through dashboard inspection, audit log accountability, and activity log context enrichment.