 Clouisle
Workflows
Build an executable, debuggable, and publishable workflow in the order of creation, orchestration, debugging, and publishing.
Feature Overview
Workflows are used to handle tasks that "must be executed step by step". Compared with Agents, which are more conversation-entry oriented, workflows are better suited for structured input, multi-node processing, conditional branches, and system integrations.
Use Cases
Workflows are commonly used for:
- Automation processes triggered by Webhook
- Business tasks that require multi-step judgment and processing
- Complex chains that connect models, knowledge bases, and tools
- Scheduled execution or batch processing tasks
Prerequisites
Before you start, we recommend preparing:
- Clear input and output definitions
- At least one set of test data
- The models, knowledge bases, or tools you need to use
- A main-flow sketch that is as simple as possible
Steps
Step 1: Confirm the workflow entry in the application list
First open the Applications page, switch to Workflow, or view existing workflows in the full list.
The main purpose of this step is to confirm:
- Whether reusable processes already exist
- Whether naming, status, and purpose already follow a unified convention
- Which business category the new process should belong to
Step 2: Click "Create Application" and choose the workflow type
After clicking Create Application, switch to Workflow in the dialog.
Then fill in the name and description to establish the business identity of this process.
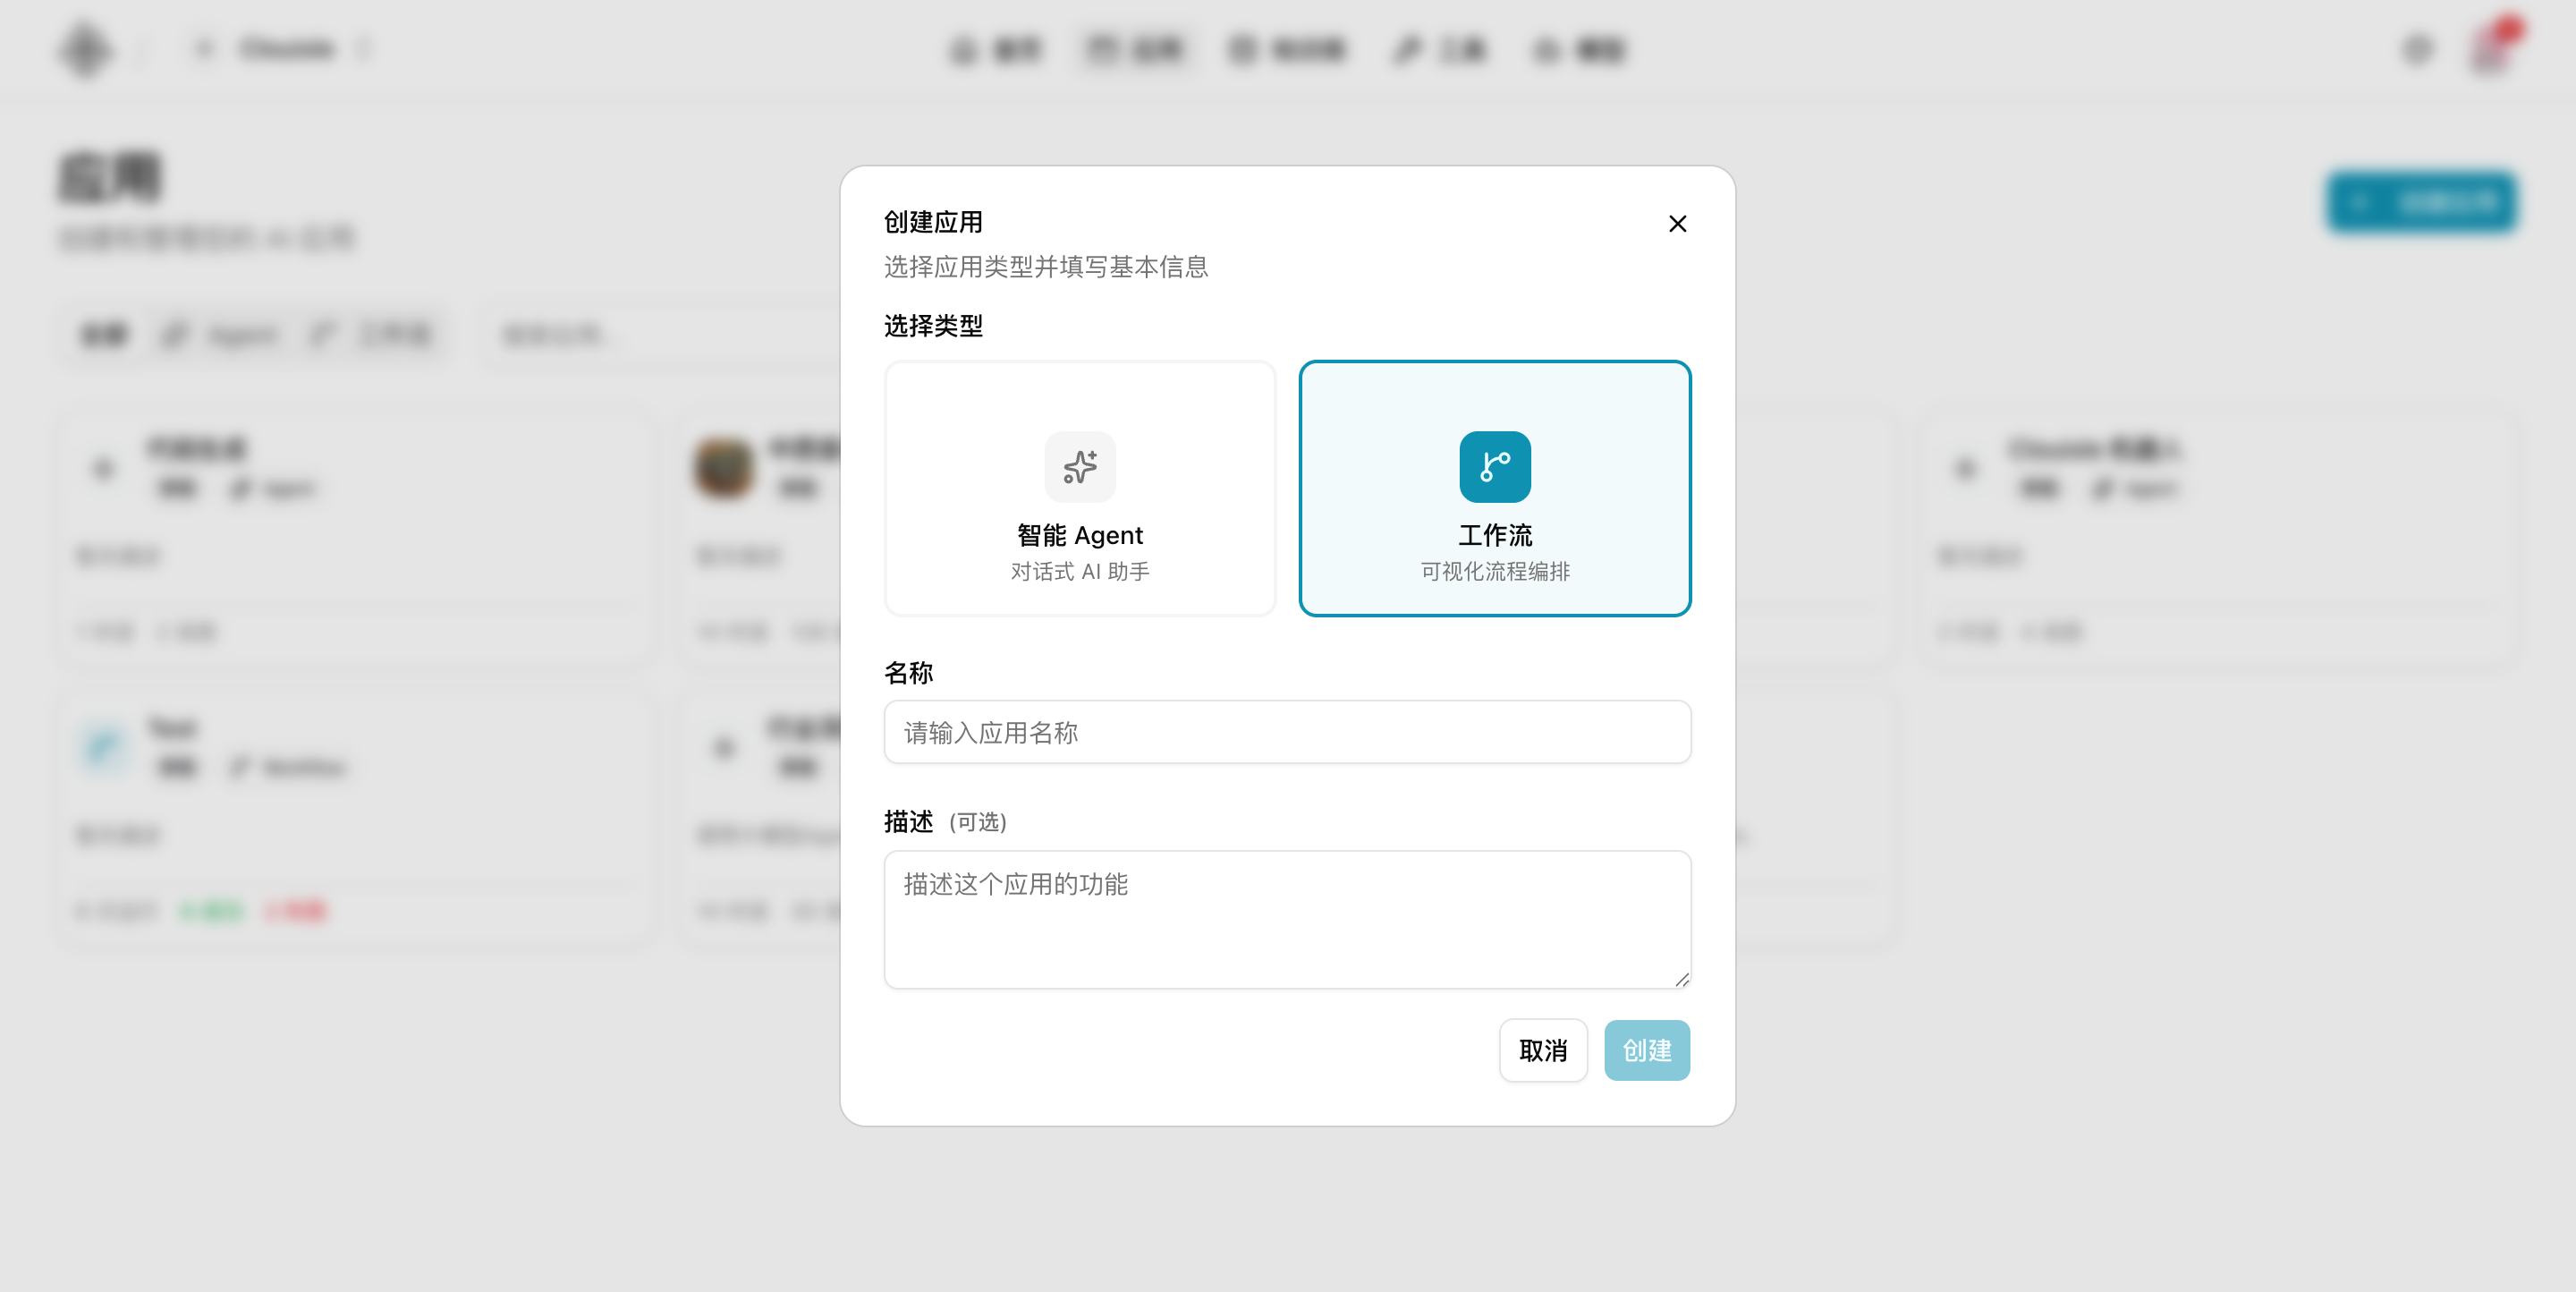
For the first name, we recommend directly reflecting the input-output relationship, such as "Form Q&A Summary Workflow" or "Lead Assignment Workflow", to avoid confusion during later maintenance.
Step 3: Open the editor and build the shortest successful path first
After opening the workflow editor, do not fill it with all nodes from the beginning. We recommend first building only a minimal chain, such as:
- Start node
- One core processing node
- End node
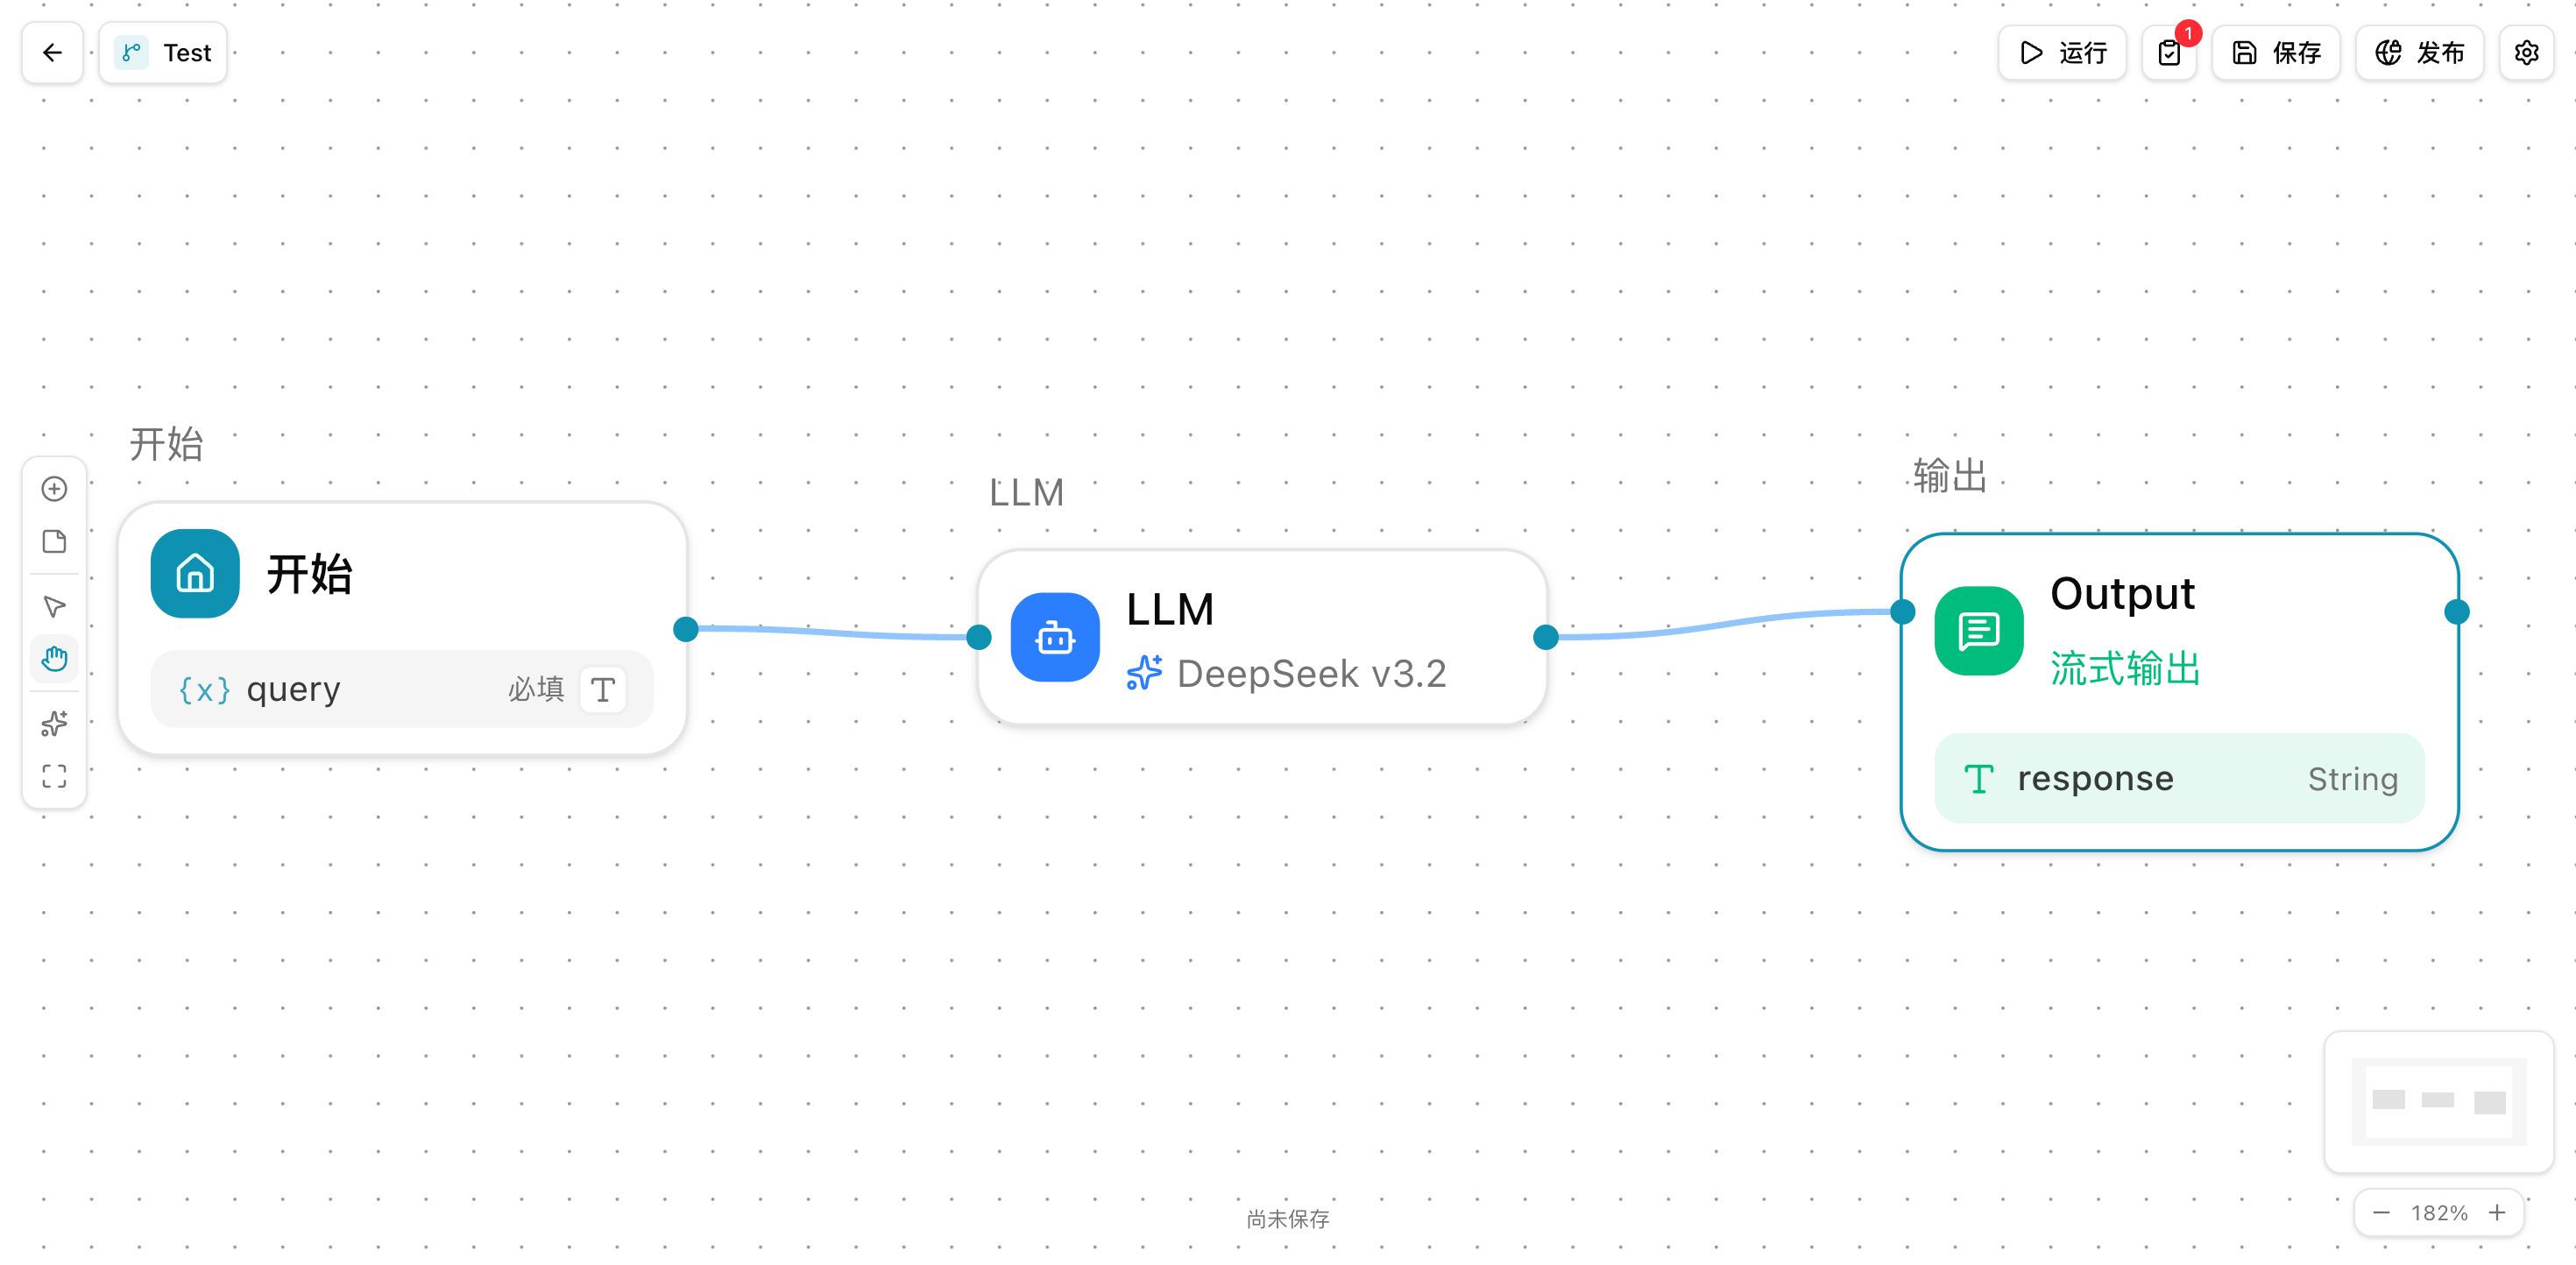
The purpose is to first verify that "the process can run", not to pursue completeness from the start.
Step 4: Then add variables, knowledge, tools, and conditional branches
After the main flow can run, add the following in order:
- Global variables
- Knowledge retrieval nodes
- Tool call nodes
- Conditional judgment or loop nodes
We recommend debugging once after adding each type of node. This makes it easier to locate which step introduced a problem if failures occur later.
Step 5: Use debug mode to inspect node inputs and outputs
During debugging, focus on:
- Which node executes first
- What input each node receives
- What result each node outputs
- At which step the result starts diverging from expectations
If you only look at the final result and not node-level execution records, troubleshooting becomes difficult once the process grows complex.
Step 6: Publish only after confirming output format and branch logic
Only consider publishing after confirming all of the following:
- Input samples can run consistently
- Conditional branches go in the correct direction
- Tool and knowledge nodes return usable results
- Output result structure meets business needs
Result Validation
A workflow ready for launch should meet at least these criteria:
- The editor can be opened from the creation dialog
- The shortest main flow can execute consistently
- Each node's input and output can be clearly seen during debugging
- Normal paths and key exception paths have been covered before publishing
FAQ
Why does the workflow look complete but still fail often?
Usually because too many nodes were added at the beginning without validating the main flow first. We recommend rolling back to the shortest path, confirming the basic chain is stable, then gradually adding complex nodes.
Why is the final output wrong, but I cannot tell where the issue is?
First check node-level execution records instead of only looking at the final result. Most issues come from a node's input, variable mapping, or tool return structure.
Why is manual triggering recommended first?
Because manual triggering is the easiest to debug. If you connect a Webhook or scheduled task from the beginning, network, authentication, and external system variables will all be added to the problem at the same time.
Notes
- Build the main flow first, and do not fill the workflow with all nodes from the beginning
- Debug once after adding each type of node
- Before connecting external systems in production, run samples thoroughly in debug mode
Knowledge Base Optimization
Continuously optimize knowledge base results in the order of material quality, chunking strategy, retrieval parameters, and fixed-sample regression.
Workflow Nodes and Execution
Understand why a workflow succeeds or fails in the order of node responsibilities, input-output checks, and execution record replay.